April 30, 2017

My Favorite Things May Release Countdown | Day 3

Hello and welcome to day 3 of the My Favorite Things May release countdown! Over the next five days we'll be sharing peeks at all of the new products with various cards and projects using the new stamps and Die-namics and my new favourite stencil! ;)

For my card today I used the new Seaside Seagulls stamp set to create a little water scene on my card with them as the focal point.


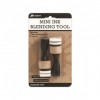
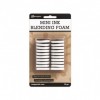
To create the background, I added Peacock Feathers Distress ink to a white cardstock panel with an ink blending tool and then I added a bit of water to life off some of the ink and give it a distressed look.

I used the little wave dies in the Seaside Seagulls die set to cut three little wave openings in the background panel for my birds to tuck into. For the area with the rock, which was a little too wide for any of the openings, I diecut two of the openings side by side to make it longer. I then ran the entire panel through my diecutting machine with the largest Stitched Wonky Rectangle die.


I love that with the little waves diecut into the background, you can tuck the seagulls in so they look like they are actually floating in the water. I added the three seagulls (with the rock from the new Mermazing stamp set) and then I adhered the finished panel to a Grout Gray card base.

Make sure to head over to the MFT blog today (and all week) to see all of the new products and more samples using them from the design team. All of the new products will officially be available in the MFT online store on Tuesday May 2nd at 9pm EST! 

See you tomorrow for more countdown fun!!

Supplies

April 29, 2017

My Favorite Things May Release Countdown | Day 4

Hello and welcome to day 4 of the My Favorite Things May release countdown! Over the next five days we'll be sharing peeks at all of the new products with various cards and projects using the new stamps and Die-namics and my new favourite stencil! ;)

For my card today I used the new Mermazing stamp set (and coordinating dies), the Beach Scene Builder Die-namics and the most awesome Cloud stencil ever, to create a magical scene on my card.


I first stamped the mermaid image onto white cardstock, coloured her in with Copic markers and then diecut her with the coordinating dies. To create the beach scene, I diecut the sand, water and islands (from the new Beach Scene Builder Die-namics) from white cardstock and then I inked them up with brown and aqua distress ink. I added water to the inking to create the look of texture on both pieces.

To create the amazing sky in the background I used the new Cloud stencil with an ink blending tool and applied the ink along the edges of the stencil to create a sky full of big fluffy clouds. I also added some diecut ones to the scene as well.


I finished the card by stamping the sentiment onto a white cardstock banner and then I adhered it to the sky area between the diecut clouds. I also added some clear sequins scattered around the card front.

Make sure to head over to the MFT blog today (and all week) to see all of the new products and more samples using them from the design team. All of the new products will officially be available in the MFT online store on Tuesday May 2nd at 9pm EST! 

See you tomorrow for more countdown fun!!

Supplies

April 28, 2017

Honey Bee Stamps Birthday Bash Blog Hop

Hello crafty friends!  Welcome to the Honey Bee Stamps 2nd Birthday Bash & SURPRISE Blog Hop!

You should have arrived here from Jennifer McGuire's blog. ;)

We are all surprising Melissa for her 2nd Honey Bee Stamps Birthday. Be sure to hop along for all the fun & prizes!! Each stop on the hop will have a drawing for a free stamp set of the winners choice from the Honey Bee Stamps store. Be sure to comment at each stop to enter all of the drawings. The winners will be announced on the Honey Bee Stamps Blog on May 3rd at Noon PST.

Now for my project! I decided to use the new Stick With Me stamp set to create a stamped art print that can be hung on the wall. I knew these succulent stamps would be perfect for it and I love how it turned out! ;)


I used one of my favourite matted frames from Ikea and used the mat to trace out a space onto a draft piece of paper so I could sketch out the design. I really wanted to make sure that everything was lined up perfectly so that I could easily stamp the images in a grid of nine.

Once I had the sketch created, I cut a piece of watercolour paper to size and recreated the lines on the watercolour paper. I used a pencil and a light had so I could easily erase the lines once I had all of the stamping done.


I stamped all of the succulents with Versafine Onyx Black ink and just took my time t stamping them since each pot and succulent is a different stamp. It did take a bit to stamp out but it was so worth it in the end.


I also stamped a small square panel that could be used as a card to go with the print and I love that the card matches it perfectly. Once I had all of the stamping completely finished, I used my Sakura Koi Watercolours to paint all of the images. I kept the colour palette pretty consistent throughout so everything would like nice and cohesive once I had it all painted.

You can see how I created the stamped succulent art print from start to finish in the video below:


Once I had the print all painted and it had time to dry I put it in the Ikea frame so it's all ready to give as a gift or to be hung on the wall.


Thanks so much for joining me today for the hop and a huge happy birthday to Melissa and Honey Bee Stamps!!

Don't forget to leave a comment on this post by Sunday midnight for a chance to win a Honey Bee stamp set.

Your next stop on the hop is Amy Rysavy. Happy Hopping!

My Favorite Things May Release Countdown | Day 5

Hello and welcome to day 5 of the My Favorite Things May release countdown! Over the next five days we'll be sharing peeks at all of the new products with various cards and projects using the new stamps and Die-namics and my new favourite stencil! ;)

For my card today I created a textured beach scene using the new Beach Scene Builder Die-namics. This card will also be part of the free online class that we offer with each release so watch for the downloadable PDF and the video for this card on release night! ;)


The Beach Scene Builder Die-namics makes it quick and easy to create beach scenes on your cards. I love that you can mix and match the elements for different looks every time.

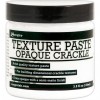
The goal on this card was to create as much texture as possible so I used ink, glitter, wood paper, and texture paste to get the various looks. I love how it looks like the sun is shining down and making the water and sand look sparkly. ;)


Once I had the scene done, I decided that I wanted to add a playful element so I added a stamped cloud and sentiment along with a cute little turtle, all from new stamp sets coming out with the May release. ;)

Make sure to head over to the MFT blog today (and all week) to see all of the new products and more samples using them from the design team. All of the new products will officially be available in the MFT online store on Tuesday May 2nd at 9pm EST! 

See you tomorrow for more countdown fun!!

Supplies

April 18, 2017

My Favorite Things A-maze-ing Card Kit!

Hello! I'm so excited to share that the newest MFT card kit called A-maze-ing is now available in the MFT online store! This kit is jam packed full of awesome products that can be used with a ton of different design ideas to create fun and interactive cards! ;)

For my card today I decided to use the awesome maze shape that comes in the kit and combine it with the Gumball Machine Die-namics to create a fun, bubble gum themed card with the maze game featured in the gumball machine.

I diecut the gumball machine parts from white cardstock and I used distress inks to add colour to them. I also added some water spritzes to them to give them a distressed and textured look. Once I the machine created, I assembled it onto a piece of light aqua paper from the Watercolor Wash paper pad and added the maze piece with the Circle SHaker pouch.

I added one of the aqua dimensional circles from the Gumball Mix to the center of the maze and then I added some aqua prills throughout the rest of the maze to look like gumballs in the machine.


Once I had the focal part of the card done, I stamped a sentiment underneath from the Gumball Greetings stamp set using Black Licorice Dye ink and then I adhered the panel to a card base with a strip of black and white patterned paper on the side and a small strip of silver sparkle cardstock.

Make sure to head over to the MFT blog for more great ideas using this months kit! It is so fun and I can't wait to see what everyone creates with it! Thanks so much for stopping by!

Supplies: