May 31, 2018

My Favorite Things June Release Countdown | Day 5


Hello and welcome to day 5 of the My Favorite Things June Release Countdown. For the next five days, we'll be sharing cards and projects featuring all of the new products coming out on June 5th at 9pm EST.

And stay tuned to the MFT blog for the week following each release - we're bringing you even more inspiration and ideas using all of the new products!

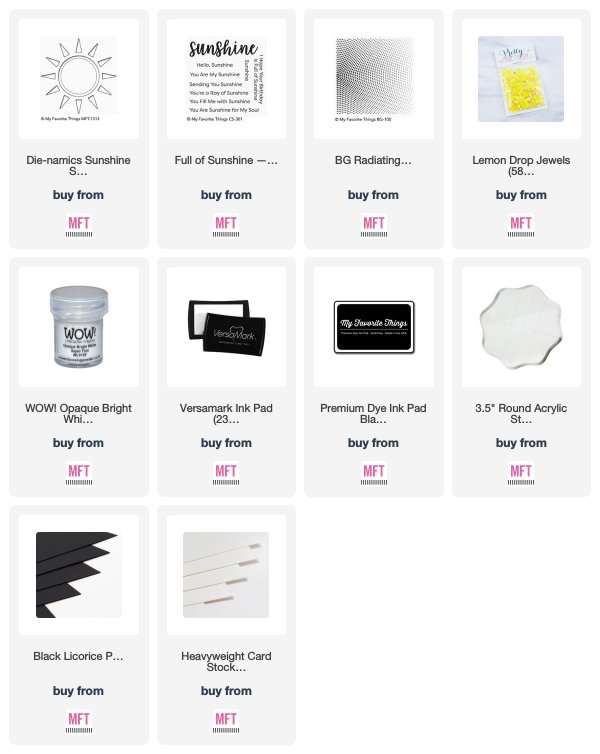
For my card today, I used the new Sunshine Shaker Die-namics, the Full of Sunshine stamp set and the Radiating Halftone background stamp! :) I love how great these products work together to make quick and easy cards.

I first embossed the background onto a white card stock panel with white embossing powder and then I added Mustard Seed Distress ink to make the embossed background stand out. I made the ink darker in the center on the left side of the panel and then let the ink fade as I went toward to the right edge. 

Once I had the background inked, I die cut the Sunshine Shaker from the left side and let it go off the edge a bit. I added the panel to a white card base leaving the sun rays empty so the white would show through. I die cut the Sunshine Shaker from another piece of white card stock and adhered that in the center of the sun so I would have the stitched design.

I stamped the sentiment onto the center circle, using post-it tape to mask it so I could stamp it on two lines instead of straight across. To complete the card, I added the finished panel to a black card base and added some Lemon Drop Pretty Pink Posh jewels.

Thanks so much for joining me for Day 5 of the June release countdown. Make sure to head over to the MFT blog for a closer look at the new products and more ideas using them.

See you tomorrow for more countdown fun!

Supplies:

May 29, 2018

Ardyth 1k Video Blog Hop


Hello and welcome back! Today I am taking part in a blog hop for my friend Ardyth who is celebrating 1000 subscribers on YouTube! Yay Ardyth!

This is a video hop, so I'll link to my video so you can join in the hop and see all of the amazing videos that everyone created. And there are prizes so make sure to check out my video description for all the details.

Click HERE to go to my video. :)


Thanks so much for stopping by! :)

May 20, 2018

5 Days to an Organized Crafty Stash | Stencils, Tools & Embellishments


Hello and welcome to a week-long organization event! I'm joining the My Favorite Things design team all this week to share our organization and storage ideas for all of our fun crafty supplies.


We're on the last day of this fun organizational series, and I have loved sharing all of my storage ideas with you! Today we're talking about tools and embellishments so let's jump right in!

I have a Raskog cart from Ikea that fits right under one side of my island. Since I use my island for filming, it's helpful to have this right beside me with some of my most used supplies. In the top, I keep baby wipes, white embossing powder, post-it tape, clear sequins, etc... just basic stuff that I grab for often. I keep all of my Scor tape rolls on the middle shelf along with my cutting pads for my diecut machine and foam tape.

On my actual work surface (which is my island) I keep a few containers that hold a bunch of different things from scissors, to craft tools, to adhesive pens to water brushes. Having this all right on my work area makes it convenient for me to grab what I need.

On my long work desk, I keep some more storage containers that hold random things. The grey storage is my new favourite and is called Fjalla (also from Ikea lol!).  It holds a ton of stuff and has lot's of differnet sized compartments, so I keep my Misti's in it, my large foam tape roll, 12x12 paper, twine, etc... so many things fit in here.

All of my ink blending tools are in a drawer in one of Alex units. I got the idea a couple of years ago from my friend Ardyth to store the tools in nail polish holders and it works awesome. I have all of the tools labeled with the colour and Distress ink name and then I keep spare ones in a container along the side.

My sequin and jewel collection are in these great bead containers from Elizabeth Ward. They hold a ton of sequins and keep them all separated in little individual containers. And since the lid is see-through, I can quickly see what's in each one and find the style and colour I need.

I have another drawer that is dedicated to all of my MFT shaker pouches and smaller items like acrylic pieces, etc... I also keep little things I purchase for projects in her like candies, lip balms, etc... I have all of my shaker pouches in a long clear container and they are separated with the dividers similar to my dies and stamps.

My most used embossing powders are in small containers that I keep together in a drawer. I have all of them labeled so I know the brand and colour and I like the convenience of having them stored this way. I also have a drawer that keeps the ones still in the original packaging.

I mentioned my felt supplies in my post yesterday, and this is a closer look at one of these drawers. This is the same unit that holds my felt but the bottom two drawers and dedicated to supplies. This one holds some of my DMC thread containers, my Surebonder glue guns and various things like fabric scissors, needles, die cut felt pieces, etc...

And lastly is my Tonic trimmer. I recently upgraded to the Tim Holtz version of this trimmer since my original one was quite old and in need of an upgrade. This is hands down my favorite trimmer. Ever. I have tried many others but always come back to this one. :)

And that brings us to the end of this fun series. I love organizing, so it was a lot of fun sharing my space and ideas! I hope you enjoyed it!

May 19, 2018

5 Days to an Organized Crafty Stash | Card Stock, Patterned Paper & Felt


Hello and welcome to a week-long organization event! I'm joining the My Favorite Things design team all this week to share our organization and storage ideas for all of our fun crafty supplies.


In today's post, we're sharing ideas for our card stock, patterned paper and felt storage. These are some of my favourite items in my craft room, and I love having everything organized and labeled to keep me productive!

My MFT card stock is stored on the same Billy bookshelf as the stamp bins that I shared earlier this week, and it takes up the entire bottom row. I keep all of my card stock in vinyl pockets from Uline (I use 9x12 pockets) and each pocket perfectly fits a full package of card stock, so I have one for every colour. I love that I can easily grab the colours I need and keep any paper scraps right in the pockets with the full sheets.

I have all of my card stock swatched on a binder ring that hangs on the side of my island so I can colour match colours before pulling out all of the card stock. I die cut them all with a tag die from Tag Builder Blueprints 4 Die-namics, and I have a label on the back of each one with the name of the card stock colour.

I keep all of my 6x6 patterned paper pads in clear bins on the same shelf of my island that I keep my stamps. The clear containers are 8" wide and about 12" long so I can fit quite a bit of paper in them. I use the largest stamp pockets from Avery Elle (designed to hold 6x8 stamp sets) and trim off the top, so they are square. 

I keep each pad in individual pockets and label them all so I can easily see what's inside as I flip through them. The great thing about keeping them in storage pockets is that I can keep the scraps in with the pads and if the pads come apart the pockets keep everything together.

My MFT felt is stored similar to my card stock. I use the same Uline vinyl pockets, but for my felt, I use the 7x10 size. The felt comes in rolls measuring 5x18 so I cut them in half and they fit perfectly in the pockets. I don't usually like storing my felt standing up because I don't like when it wrinkles, but since this felt is a bit smaller, I have no problems storing it this way. And each of the pockets has a piece of white card stock added in for additional support.

All of my MFT felt is swatched on a printable color chart (you can get it on the MFT blog here)  and I keep it in the same vinyl pocket that I use for my card stock to keep it protected. I used a square die to cut out small swatches of each felt colour, and then I glued them onto the chart with liquid glue. I love having this as a resource to quickly choose the colours I want.

And lastly is my non-MFT felt. These are larger pieces, so I like to store these flat. I have an Alex drawer unit in my craft room that is specifically for felt and related supplies. I store the felt flat in colour families and just pull put what I need as I'm creating.

Thanks so much for joining me again today! I'll be back tomorrow with one more day of organizational fun!

May 18, 2018

5 Days to an Organized Crafty Stash | Dies


Hello and welcome to a week-long organization event! I'm joining the My Favorite Things design team all this week to share our organization and storage ideas for all of our fun crafty supplies.


Each day we're covering a different topic and today is all about dies. My die storage is similar to my stamp storage. Everything is labeled and sorted in a system that works for me and allows me to easily find what I'm looking for. 

I use the same divider system for my dies that I use for my stamps. I print the category onto label tape, add it to card stock and laminate them to make then durable. Having them broken up into specific categories is so great because I don't have to go through a ton of dies to find what I need.

I store all of my MFT dies together in clear bins that I keep on a shorter set of Alex drawers. I like having them all out in the open, so they're easily accessible. I use larger storage pockets for my bigger dies and small pockets for my small dies. And as mentioned in my stamp post, these are all my standalone dies. All of the dies that coordinate with stamp sets are stored with those.

Thanks so much for joining me today. I hope you enjoyed my ideas for die storage and I'll see you tomorrow for more organizational tips!
 

May 17, 2018

5 Days to an Organized Crafty Stash | Stamps


Hello and welcome to a week-long organization event! I'm joining the My Favorite Things design team all this week to share our organization and storage ideas for all of our fun crafty supplies.


Each day we'll cover a different topic, and today we're talking about stamps. Stamps are one of my favourite supplies, and I like to keep them pretty organized so I know exactly where to find what.

First up is all of my MFT stamp sets. I keep them all on an aqua Billy bookshelf that I bought at Ikea a couple years ago. I think this exact colour is discontinued, but the general style is still available.  I have a bunch of Sterlite crates that fit perfectly on the bookshelf, 3 across and they hold all of my clear stamps and my red rubber background stamps.

My clear stamps make up three rows of the bookshelf, and the red rubber stamps fit along the top of the shelf. I was putting my background stamps in clear sleeves, but I actually prefer to leave them just as is and stack them inside the container with dividers separating the type of design - stripes, dots, geometric, etc...


All of my stamps are separated by dividers. I used a label maker and clear label tape to add the category title to a piece of card stock, and then I laminate them to make them stronger and able to hold up to constant handling. I love this system because it lets me customize the dividers to what works for me and I can just create more as needed.

I store all of the clear stamps in clear sleeves from My Favorite Things. My 4x6 sets go in these ones, and my 4x8 sets go in these ones.  I use my label maker to print out all of the stamp names (I use 12mm black on white label tape), and I add the label to the top left so I can easily find what I need. The white card stock backing sheet is just cheaper card stock that I buy in bulk and cut down to fit the pockets.

If any of my stamp sets have coordinating dies, I keep those in the same pocket as the stamps but tuck them in behind. I used to store them separately but have found over the years that this way is much more convenient.

Any of my non-MFT stamp sets are stored under my island on a shelf in clear Interdesign storage bins. I separate those ones by the manufacturer rather than the theme and do have some dies mixed in there as well. I don't have a lot of stamps and dies from others since I don't use them as often, but I love keeping the ones I have organized so I can find them often. These ones include The Ton, Lawn Fawn, Altenew, Ellen Hutson, Mama Elephant, Wplus9, Neat and Tangled, Hero Arts, etc...

I hope you enjoyed these crafty storage ideas for my stamp sets. I'll see you tomorrow for more organization fun!

Thanks so much for stopping by!

May 16, 2018

5 Days to an Organized Crafty Stash | Inks and Coloring Mediums


Hello and welcome to a week-long organization event! I'm joining the My Favorite Things design team all this week to share our organization and storage ideas for all of our fun crafty supplies.


Each day we'll cover a different topic, and today we're starting with inks and coloring mediums. I love to add color to my projects, so I have a lot of things to share today! :)


First up is my acrylic paints... I do have more than this stored in a bin but these are my most used, newest and most colourful. I bought this 2 tier cake stand at Ikea (I'll be saying Ikea a lot LOL!) and love it for storage as well as a pretty display in my craft room. I keep Nuvo drops in the top and I keep my Distress Paints and Vicki Boutin paints on the bottom. 

Next is my small ink cubes. I don't have a ton of these because I prefer the larger pads but the ones I do have fit in these acrylic drawers from Muji perfectly! I have my MFT ones at the top and my Distress inks in the drawers below.

I use my pencil crayons quite often so I like having them in an open container so I can see the colours and reach for them easily. I couldn't find one that I liked so I ended up making this storage unit from an idea I found online. 

I bought a lazy susan spinner stand and a bunch of couplings (used in construction) and turned it into a pencil holder. I first glued patterned paper onto all of the white couplings and then I glued them into the spinner all around the edge. In the center, I have a larger coupling, and it holds erasers, pencil extenders, etc...  I love that it spins and fits my full collection of Prismacolor pencils.

My Copic markers are in a wooden tray from an Etsy store called TJandThings. These are custom made to hold Copic markers and fit all 358 with 2 extra slots. I keep 2 extra colourless blenders in mine because the empty holes drive me crazy LOL!

The wooden holder is designed to fit in the top of my Ikea Raskog cart, and I used the rest of the cart to hold Copic supplies, paper, ink pads, etc... Pretty much everything I need to colour so I can just push the cart around the house with me.

I have all of my Copic refills in 2 Tjena boxes from Ikea. These are just cardboard boxes, so I did reinforce the bottom of them, but I love them because the sides of them are completely straight and not angled at all. This allows the refills to stand up perfectly straight and lets me equal rows across.

All of the refills fit into 2 of these boxes with a bit of extra room on one of the boxes. I keep a small container in the open space that holds extra nibs, alcohol wipes, my scale, etc... everything I need to do Copic maintenance.

I have all of my MFT ink pads stored in my Alex drawer unit (from Ikea) in one drawer. I label them all on their sides so I can easily see what colour they are when I open the drawers and I stack them on their side. They fit really nicely in the drawer, and I have stored them this way for quite a while and really love this system, It doesn't take up a lot of space, but they are in easy reach.

I have all of the colours swatched on 2" x 2" printed squares (from Jennifer McGuire), and I keep them in page protectors from Simple Stories. They are all held together with a binder ring, and I hang this on the side of my island so I can quickly grab it whenever I need to refer to it.

I do have one ink storage container from Organzine More on the wall that hols my most used Distress ink, Distress Oxide ink and Catherine Pooler inks. I also have some storage cups on it (from Ikea LOL!) and a Christmas tree, so there's a bit of Christmas in here all year. :)

Most of my watercolour paints and pencils are in a few drawers in one of my Alex units. I don't really have a system for these. I just stack them inside until the drawer is full and then move onto the next one lol!

I did recently re-organize my Prima paints. I bought 2 48-pan Meeden palettes and moved 8 of my confection sets into these. I love that I have 2 larger palettes instead of 8 small ones. Makes it so much easier to move around with them. I also have my Daniel Smith dot cards ina vinyl pocket - these are definitely one of my newest obsessions haha!

And lastly, I have my alcohol inks. I keep these in a large Sistema container that has a snap on lid. They all fit standing upright, and I keep some blending tools, felt and my alcohol ink tools right in the container with them.

Whew! I think that about covers it for inks and coloring mediums. I hope you enjoyed these crafty storage ideas and I'll see you tomorrow for more organization fun!

Thanks so much for stopping by!

May 15, 2018

MFT & Friends | May Release


Hello and welcome back! Today I have a card to share for a new monthly feature on the My Favorite Things blog called MFT & Friends. The design team will be sharing even more cards with the newest release, and we'll be joined by different friends of MFT each month!


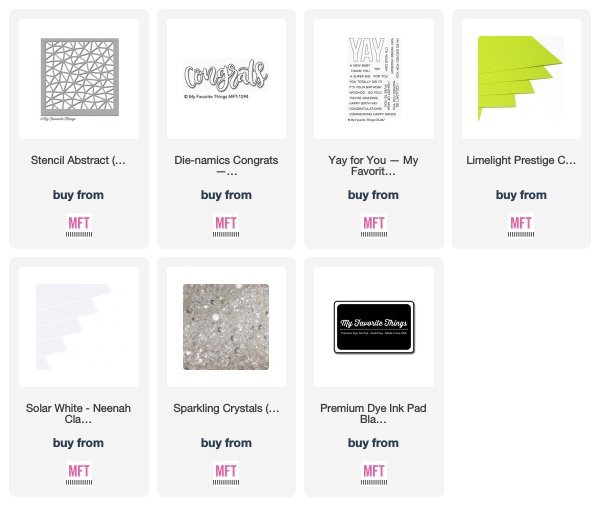
I decided to create two cards using a rainbow coloured panel that I created with one stencil. I used the Abstract stencil and temporarily adhered it to a white card stock panel, and then I added distress inks over the top in bright colours.

Once I had all of the colour applied, I removed the stencil and cut the panel in half diagonally. I was then able to use each of the halves on separate card designs. I used the blue/green side with the new Party Die-namics and the pink/orange side with the new Congrats Die-namics.

I added them both to a Limelight card base and completed the greeting with a stamped sentiment from the Yay for You stamp set. I finished the cards with a couple of clear gems for some added dimension since they are all one layer.

I also wanted to quickly share the card I made for this month's May release class. I used the new Mini Rolled Roses dies to add fun dimension to a stamped wreath:

You can see the video and download a PDF of the project here.

Make sure to head to the MFT blog to see more ideas from the design team and the amazing designers joining us this month. Thanks so much for stopping by!

Supplies