November 19, 2019

MFT November Vault Release


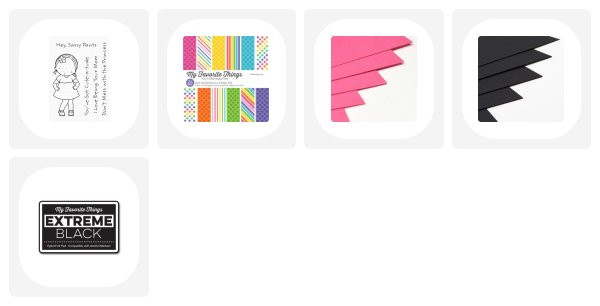
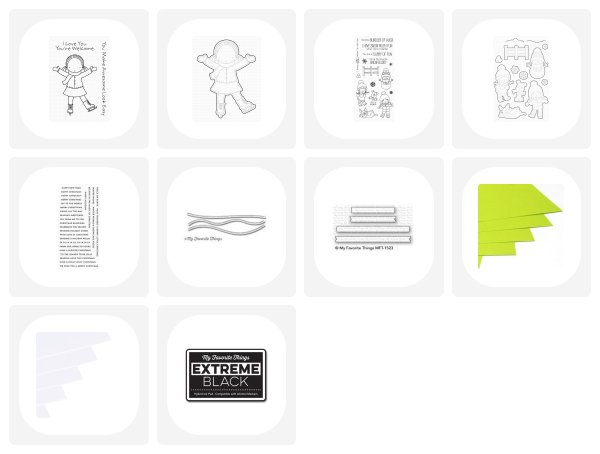
Hello, and welcome back! It's time for the next Vault release from My Favorite Things! This month we have a couple of new Birdie Brown sets as well as a new a la mode and Pure Innocence.

All of the new Vault products are available now at My Favorite Things! :)

I stamped the Cute-a-tude PI girl on both a panel of white card stock as well as two pieces of patterned paper from the Over the Rainbow paper pad. I then fussy cut the dress and glued it over top of the stamped image to give her a fun and colorful dress.

I coloured the rest of her in with Copic markers and added some grey shading at the bottom to give her a bit of a shadow. Tne sentiment was stamped on black card stock, heat embossed with white embossing powder and adhered to the card with foam adhesive for some added dimension.

Make sure to head over to the MFT blog to see all of the new products releasing today!

Supplies:

November 13, 2019

MFT Wednesday Sketch Challenge 463


Hello and welcome back to my blog. Today I have a card to share for the newest My Favorite Things Sketch Challenge. This week's sketch features an ornament design and I never pass up the chance to make a holiday card LOL!

For my card, I used the Mesmerizing Mandala to create a silver sparkle ornament. I started off the card by masking off a circle in the center and then I ink blended all around it to create a purple sky. I used Shaded Lilac right against the circle area to keep it a bit lighter and then added Seedless Preserves and Chipped Sapphire to the outisde.

Once I had the mandala die cut, I die cut it a second time with the same circle I used for the mask, and then I adhered it onto a slightly larger vellum circle. I adhered the ornament over the white area in the center and added a string and ornament topper to the top of it.

I finished the card by adding a sentiment banner stamped with the Bitty Holiday Blessings stamp set.

Thanks so much for stopping by today!

Supplies:

November 07, 2019

My Favorite Things Color Challenge #129


Hello! Today I have a card to share for the newest MFT Color Challenge. I love creating cards with a specific colour palette already decided for me.... it takes the guesswork out of deciding what colours to use together, and it usually gets me to use colours that I don't normally use.

For today's card, I used the Sip Sip Hooray Die-namics to create a clean & simple New Year's Eve card with an unexpected colour palette for the occasion.

I used all 4 colours to die cut the letters and then I used the negative piece from one of the die cuts as a template to get everything lined up straight on the card.

I then stamped a sentiment onto black card stock from the Bitty Holiday Wishes stamp set and layered it over the bottom row of letters to complete the card.

Thanks so much for stopping by today!

Supplies:

November 06, 2019

Wednesday Sketch Challenge #462


Hello and welcome back to another Wednesday Sketch challenge post! This week's sketch features a heart with a simple design that can be adapted for pretty much any occasion. I decided to replace the heart with a square on mine and create and fun and playful holiday card.

I stamped out and coloured the palm tree and the Santa from the Fun Lovin' Santa stamp set and added them on top of the square element. I heat embossed the Ho Ho Ho background onto the square and added some aqua around the edges to help it stand out from the white panel on the card.

I stamped out the sentiment from the Bitty Holiday Wishes stamp set onto Sour Apple card stock and die cut it with the Skinny Strips Die-namics before adding it to my card. I adhered the finished panel to a Razzle Berry card base and added a few clear droplets for some added dimension.

Thanks so much for stopping by today!

Supplies:

November 05, 2019

The New November Release is Available NOW!


Hello and welcome back! All of the new products we've been sharing for the past five days are available now at My Favorite Things! So many great winter and holiday products sure to get you into a creative mood!

For my card today I used the new Party Lights stamp set to create a fun, colourful card perfect for the holiday season.

I stamped out the strings onto a white card stock panel with black ink and then I die cut the coordinating lights from white card stock and coloured them in with Copic markers.

I curved a sentiment from the Bitty Holiday Wishes stamp set onto an acrylic block so it would match the sting of lights and stamped it in black ink. I then added white pen highlights to the lights and covered them all in Glossy Accents to make them shine!

Make sure to head to My Favorite Things to see all of the new products!

Supplies:

November 04, 2019

1 More Day Until the November Release!


Hello, and welcome back! We only have 1 more day until the MFT November release is available, and we have more great products to share! All of the new products are coming tomorrow, November 5, at 10am EST!

For my card today, I used the new Fantasy Florals stamp set to create a card that looks like a holiday card even though the flowers probably aren't. That's one of my favorite things about flower stamps... you can make them look any way you want just by changing out the colours and adding some details.


I stamped the flower cluster onto a white card stock panel and coloured it in with Copic markers using some of my favourite holiday colours together. Once I had it all coloured, I used a white gel pen to add snow detail over all of the flowers. Adding the snow really makes it look more festive.

I stamped a sentiment onto Tropical Teal card stock, heat embossed it with white embossing powder and die cut it with the Skinny Strips Die-namics. I used the Bitty Holiday Wished for the sentiment to tie the whole card together. I really love how it turned out... I think it looks so pretty with the wno detail.

You can see how this card was created, with a different colour combination, in today's MFTv video.

Thanks so much for joining me today. Make sure to head over to the MFT Blog for a closer look at the new products and more ideas using them.

See you tomorrow for the release party!
Supplies:

November 03, 2019

Are You Ready? 2 Days Until the November Release!


Hello, and welcome back! We have 2 more days until the MFT November release is available, and we have more great products to share! For the next two days, we'll be sharing more cards and projects featuring all of the new products coming out on November 5 at 10am EST.

For my card today, I used the Sassy Skater stamp set to create a colourful, wintery scene. I love anything skating related, so I couldn't wait to create a scene with her!


I stamped her onto Neenah card stock with Extreme Black ink and coloured her in with Copic markers. I also stamped the fence and some snowballs from the Snow Buddies stamp set to complete the scene.


I stamped a sentiment onto Razzle Berry card stock, heat embossed it with white embossing powder and die cut it with the Skinny Strips Die-namics. I added snow detail to the background with white paint (I think I mentioned a few days ago that I created a lot of snow on my cards this month LOL!) and added the finished panel to a Limelight card base.

Thanks so much for joining me today. Make sure to head over to the MFT Blog for a closer look at the new products and more ideas using them.

See you tomorrow for more countdown fun!
Supplies:

November 02, 2019

3 More Days Until the MFT November Release!


Hello, and welcome! We have 3 more days until the MFT November release is available, and we have more great products to share! For the next five days, we'll be sharing cards and projects featuring all of the new products coming out on November 5 at 10am EST.

For my card today, I used the Serene Snowflakes stamp set and paired it the Captions Numbers Die-namics to create a card perfect for New Year's Eve, with a winter design.


I stamped the snowflakes onto a white card stock panel and heat embossed them with white embossing powder. I then added ink to the background with Peacock Feathers, Chipped Sapphire and Seedless Preserves Distress Inks and distressed it with some water droplets.

I die cut the numbers from Silver Sparkle card stock and adhered them with the largest snowflake. I finished the design with bows that I die cut from the Filled with Joy Die-namics and added some clear sequins and Silver Stickles for added shine.

Thanks so much for joining me today. Make sure to head over to the MFT Blog for a closer look at the new products and more ideas using them.

See you tomorrow for more countdown fun!
Supplies:

November 01, 2019

4 More Days Until the November Release is Here!


Hello, and welcome to day 4 of the My Favorite Things November Release Countdown. For the next five days, we'll be sharing cards and projects featuring all of the new products coming out on November 5 at 10 AM EST.

For my cards today, I used the new Impressive Thank You Die-namics along with the new Serene Snowflakes stamp set to create two winter card designs.

The Impressive Thank You Die-namics is a new foil die that we are releasing this month. It doesn't actually die-cut - it works with a hot foil machine to create foiled, letterpress impressions. It looks so pretty in real life, but it is SO hard to photograph and show the beautiful shine.


After I did the foiling with the thank you words, I stamped and heat embossed the snowflakes around the edges of the panels. I then added blue inks to one panel and purples to the other to create a wintery feel. I finished the card with Silver Stickles in the centers of the embossed snowflakes.

You can see how I created these cards in today's video on the MFTv YouTube channel. :)

Thanks so much for joining me for Day 4 of the November release countdown. Make sure to head over to the MFT Blog for a closer look at the new products and more ideas using them.

See you tomorrow for more countdown fun!
Supplies:

October 31, 2019

It's Time for the November Release Countdown!


Hello, and welcome to the first day of the My Favorite Things November Release Countdown. For the next five days, we'll be sharing cards and projects featuring all of the new products coming out on November 5 at 10am ,EST.

For my first card today, I used the Snow Buddies stamp set to create a fun and playful winter scene with a cute snowman and an adorable puppy, which I, of course, coloured to look like my own. :)


I stamped out the images onto Neenah Solar White card stock and coloured them in with Copic markers. I then created the background with Distress Inks and white paint to create a very snowy scene.

I finished the card with a stamped sentiment that I heat embossed onto an Essential Sentiment Strip and adhered it to the snow hills that I die cut from the Stitched Snow Drifts Die-namics.

For my second card, I used the new Mistletoe Cover-Up Die-namics to create another snow-filled card.

I die cut the Mistletoe Cover-Up and added colour to it with Lucky Clover Distress ink. I them layered it onto a Steel Grey card base, added my stamped sentiment strips and then covered it with snow using white paint mixed with water. I did this technique on a few cards this month... I love the look of snow on winter card designs.


Thanks so much for joining me for Day 5 of the November release countdown. Make sure to head over to the MFT blog for a closer look at the new products and more ideas using them.

See you tomorrow for more countdown fun!
Supplies:

October 29, 2019

Hits & Highlights | October 2019


Hello and welcome back! Today I have a card to share for this month's MFT Hits & Highlights feature. This month we're combining new holiday product with older holiday product to create some fun new looks!

For my card today I used the Snowflake Window Die-namics with the new Bitty Holiday Wishes to create a clean & simple card design.

I die cut the snowflake pattern in the center of a white panel using just the inside of the die so it would create the pattern but not actually die cut the rectangle out.  I then layered the panel onto a piece of Silver Sparkle card stock with foam adhesive and then added it to a Sour Apple card base.

I stamped out the single sentiment onto two separate Skinny Strips and stacked them on the card design to complete the sentiment. To finish the card I added some sparkly green enamel dots to some of the snowflake centers to coordinate with the card base.

Thanks so much for stopping by today - see you later this week for the November release countdown!

Supplies:

October 23, 2019

MFT Sketch Challenge 460


It's time for a new sketch challenge on the My Favorite Things blog, and I have a festive card design to share. I love the simplicity of this week's sketch and decided to keep my card very clean and simple.

I stamped my favourite dog image from the Happy Pawlidays stamp set onto a piece on Neenah Solar White card stock with Extreme Black, and then I coloured him in with Copic Markers. I coloured him with warm greys and used red, green, and aqua for the Christmas lights, his Santa hat, and his collar.

I stamped the sentiment from the Bitty Holiday Wishes stamp set onto a white card stock piece, and then I die cut it with the smallest of the Skinny Strips Die-namics and added it to the card with foam adhesive. I finished the card by adding clear glaze over all of the lights and his nose, and I also added Stardust Stickles to his Santa hat.

Thanks so much for stopping by today!

Supplies:

October 22, 2019

Snow Globe Greetings Card Kit Release!


Hello, and welcome back! Today is the official release of the new Snow Globe Greetings Card Kit from My Favorite Things. I love this kit so much and look forward to creating even more holiday cards with it.

For today's card, I decided to just use the Believe die (the Free with $60 that releases with the card kit), and I kept the design pretty simple.

I die cut the word believe with Jellybean Green card stock and layered it over a stamped sentiment strip that I die cut from Milk Chocolate card stock. The sentiment is from the Bitty Holiday Wishes stamp set.

I also stamped a Santa hat from the Tis the Season stamp set, fussy cut it with my scissors, and then I adhered it on top of the B so it would look like it's hanging off the word. I love the message this card sends with just the sentiment and a Santa hat. :)

Thanks so much for joining me for the card kit release!

Supplies:

October 21, 2019

Merry Kissmas | Snow Globe Greetings Card Kit


I'm back today with another card featuring the new Snow Greetings Card Kit from My Favorite Things. I love using Kraft card stock on holiday cards because I love the look of whie against it, making it perfect to highlight snow. :)

For my card today I used the Mistletoe Kisses Die-namics along with the Tall Snowglobe Die-namics to create a shaker snow globe full of wintery snow.

To create the snowy background I first added some white pigment ink to a Kraft card stock panel and then I added the die cut mistletoe on top. I then added a bunch of white dots to the background with a white gel pen to make it look like it was snowing both inside and outside the globe.

I added some Diamond Dust to the inside of the globe and sealed it in to add even more snow because I love all the snow LOL! I stamped the sentiment onto a die-cut base and added it to the card with foam adhesive for some added dimension.

You can see how I created this card from start to finish in today's episode of MFTv.
See you tomorrow for the release party!

Supplies:

October 20, 2019

Happy Holidays | Snow Globe Greetings Card Kit


Hello, and welcome back! Today we are starting the countdown to the newest card kit from My Favorite Things called Snow Globe Greetings.

This kit is so perfect for the holidays and includes a beautiful assortment of products that make holiday card making easy and fun!

For my card today, I created a simple scene with the Mistletoe Kisses Die-namics and a stamped sentiment underneath. I added some white pigment ink to the background and some white pen detail to look like snow, and then I layered the mistletoe, berries, and silver bow on top.

I added the Kraft panel to a green card base and paired it with a coordinating red envelope. This would be a great card design to mass produce for the holidays! :)

See you tomorrow for more countdown fun!

Supplies:

October 18, 2019

MFT + Ellen Hutson Blog Hop!


Hello, and welcome back! Today we have a fun post to share because we've teamed up with some of the amazing designers at Ellen Hutson and created a bunch of cards that use both MFT products as well as Ellen Hutson products.

I used the adorable Sew Cute die from Ellen Hutson and paired them with our products to create 2 stitched designs - 1 on paper and 1 on felt!

For my ornament, I used MFT felt along with our new Peace on Earth and Captions Alphabet Die-namics to create a beautiful ornament perfect for gift giving. I love how the birds wings seem to fly right off the ornament.  

Once I was finished the ornament, I decided I wanted to also create a stitching project with card stock so I used the Sew Cute Snowman and created a fun stitched design with him on my card.

I used fun colours of DMC floss to sew him up and added dimension by adhering his hat with foam adhesive. I also added a faux stitched snow drift and used a white gel pen to add stitching detail. The sentiment is stamped from our Bitty Holiday Wishes stamp set and stamped onto a Wild CHerry sentiment strip that I die cut with the Skinny Strips Die-namics.

Thanks so much for stopping by today! Make sure to head over to the MFT Stamps blog for a ton of inspiration from designers at MFT and Ellen Hutson!

Supplies: