Showing posts with label Guest Designer. Show all posts

November 14, 2018

25 Days of Christmas Tags - 2018


Hello and welcome back. Today I am taking part in the 25 Days of Christmas Tags. 

Once again, MCV is the proud sponsor for today's installment of The 25 Days of Christmas Tags which is hosted by the lovely and talented Tracey McNeely.

We've chosen a theme of Botanicals - trees, mistletoe, holly - any festive greenery works!

I used the My Favorite Things Poinsettia die and went with non-traditional colours. I love the mix of aqua, pink and green. To give it a more wintery feel, I added splatters of white acrylic paint for snow. I love how it looks against the flower petals and leaves.

Make sure to visit Tracey's blog to see more tags from today's sponsor and to enter the giveaway!
Thanks so much for stopping by!

December 11, 2017

Advent Calendar Extravaganza with Taheerah Atchia

Hello and welcome back! I'm excited to be playing along in this years Advent Calendar Extravaganza with Taheerah Atchia.


Advent Calendar Extravaganza is -the- festive event of the season! This ‘hop with a twist’ was dreamed up by Taheerah Atchia and features surprise destinations each day! Joining in the fun with Taheerah are ONE HUNDRED special guests - each serving up some fantastic Christmas inspiration! Just like an Advent Calendar, you’ll never know where you’re going to be visiting next until you ‘open the door’!

And that’s not all! With 25 *amazing* sponsors taking part as guests as well, your crafty wish list is bound to get a boost with a chance to win a prize EVERY SINGLE DAY!!

Join in the fun every day at taheerah-atchia.com to see what special surprises await behind the door!

For my card, I used today's sponsor, Waffle Flower, but I didn't have any holiday stamps made by them so I had to get creative. :)


I used the Riverside stamp set and tuerned the elemennts in this stamp set into a winter scene. I'm sure it's a little chilly in the tent, but I don't think the bunny minds LOL! When I stamped the bunny, I didn't ink the top of his head so I could draw a Santa hat on him and make him a little festive.

I did some masking to create the scene with the tent, bunny, trail and tree stamps and then I coloured the rest of the scene with my Copic markers to give it a night sky. I also used my white gel pen to make it snow.


Since the stamp set didn't have any holiday sentiments, I used a sentiment from a Neat and Tangled stamp set to complete my card.

It’s not a party without a prize - and with prizes every day there are several chances to win! Today’s prize is generously supplied by Waffle Flower so you’ll definitely want to win! Simply leave a comment on this post - then head back to taheerah-atchia.com and leave a comment there too! You must leave a comment on Taheerah’s blog as well as mine in order to be eligible to win! Don’t forget to grab the other surprise destinations from Taheerah’s blog and head over to them to leave comments there as well to improve your odds even more! You have until 23:59 EST on 31st December 2017 to enter.

Don’t forget Advent Calendar Extravaganza runs from 1st-25th December inclusive so make sure you visit taheerah-atchia.com every day for fabulous inspiration and amazing prizes every single time! Merry Christmas!

November 15, 2017

25 Days of Christmas Tags

Hello and welcome back. Today I am taking part in the 25 Days of Christmas Tags hosted by my awesome friend Tracey McNeely


I'm sharing a tag along with Muse Christmas Visions who are the sponsors for today!

For my tag today I used two stamp sets from Hero Arts - the Poster Christmas Carols (one of my favourite holiday sentiment sets this year!) and the Winter Time Fun stamp set. I wanted to create a little winter scene with falling snow on the entire tag including the top of the sentiment.


I stamped out the scene on a white tag I diecut with the Neat and Tangled Classic Tag die and then I added my sentiment in the open area near the top. I coloured it all in with Copic markers and used a white gel pen to add the snow detail. I added a silver tag in behind it and then I added some fun red ribbon so it can be tied to a gift.

Make sure to visit Tracey's blog to see more tags from today's sponsor and to enter the giveaway!
Thanks so much for stopping by!

May 15, 2017

Ellen Hutson Classroom Guest

Hello! I'm excited to be guesting today in the Ellen Hutson CLASSroom with a glittery project using the Mondo Magnolia stamp set. 

Here is a little peek at the card I'm sharing:


You can see the full post in the EH CLASSroom here.

And the awesome people at Ellen Hutson have provided me with a $50 GC to give away to one lucky blog reader!


Huge congrats to Purple Princess! You are the randomly selected winner for the GC to Ellen Hutson! :)

Thanks so much for stopping by!! ;)

April 28, 2017

Honey Bee Stamps Birthday Bash Blog Hop

Hello crafty friends!  Welcome to the Honey Bee Stamps 2nd Birthday Bash & SURPRISE Blog Hop!

You should have arrived here from Jennifer McGuire's blog. ;)

We are all surprising Melissa for her 2nd Honey Bee Stamps Birthday. Be sure to hop along for all the fun & prizes!! Each stop on the hop will have a drawing for a free stamp set of the winners choice from the Honey Bee Stamps store. Be sure to comment at each stop to enter all of the drawings. The winners will be announced on the Honey Bee Stamps Blog on May 3rd at Noon PST.

Now for my project! I decided to use the new Stick With Me stamp set to create a stamped art print that can be hung on the wall. I knew these succulent stamps would be perfect for it and I love how it turned out! ;)


I used one of my favourite matted frames from Ikea and used the mat to trace out a space onto a draft piece of paper so I could sketch out the design. I really wanted to make sure that everything was lined up perfectly so that I could easily stamp the images in a grid of nine.

Once I had the sketch created, I cut a piece of watercolour paper to size and recreated the lines on the watercolour paper. I used a pencil and a light had so I could easily erase the lines once I had all of the stamping done.


I stamped all of the succulents with Versafine Onyx Black ink and just took my time t stamping them since each pot and succulent is a different stamp. It did take a bit to stamp out but it was so worth it in the end.


I also stamped a small square panel that could be used as a card to go with the print and I love that the card matches it perfectly. Once I had all of the stamping completely finished, I used my Sakura Koi Watercolours to paint all of the images. I kept the colour palette pretty consistent throughout so everything would like nice and cohesive once I had it all painted.

You can see how I created the stamped succulent art print from start to finish in the video below:


Once I had the print all painted and it had time to dry I put it in the Ikea frame so it's all ready to give as a gift or to be hung on the wall.


Thanks so much for joining me today for the hop and a huge happy birthday to Melissa and Honey Bee Stamps!!

Don't forget to leave a comment on this post by Sunday midnight for a chance to win a Honey Bee stamp set.

Your next stop on the hop is Amy Rysavy. Happy Hopping!

April 13, 2017

Altenew 3rd Anniversary Blog Hop

Hello and welcome to my stop on the Altenew 3rd Anniversary blog hop! I am excited to be sharing in the celebration! Make sure to check out the Altenew blog for links to all of the hoppers today - and all of the rest of the days this week! You should have arrived here from Vera's blog.


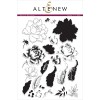
For my card today I used one of my favourite Altenew stamp sets: Peony Bouquet. I love the large florals in this set and really enjoy colouring them using various colouring mediums.


When I stamped my flowers I knew I wanted to manipulate the stamped lines and make them a lot bolder and darker so I completely covered each of the stamped images with Distress Oxide inks, not worrying that I was really muting the lines.

Once I had the ink down, I used a water spritzer and added water to all of the images to give them a distressed look. I love the added texture and dimension that you get when you add water to these inks. Once I had them all inked and they were dry, I used a 0.5 black Copic Multiliner and traced over all of the flower and leaf lines added thicker lines in various places to really make the black inking the focus of the flowers.


I added a black and white striped paper piece to the side with a strip of sparkle silver cardstock and then I adhered the flowers and leaves to the card base. I stamped and adhered the label sentiment over top with foam adhesive and finished it off with some sparkly gems that I picked up from my local craft store.

Special Offer at Altenew for their 3rd anniversary: 
FREE U.S. shipping with code HAPPY3RD or $5 OFF international shipping with code ANNIVERSARY at checkout. Offer valid from April 11th through April 16th at 11:59 pm EDT. Not valid on prior purchases. Cannot be combined with other promo codes.

Prizes:
Altenew is giving away $50 gift certificates to FIVE lucky winners. There are also 12 awesome companies who are celebrating with us, and they are offering the following prizes:


Be sure to leave comments by Tuesday, April 25, 2017 at 11:59 PM EDT for a chance to win! 21 WINNERS will be chosen at random from the comments left on any of the blogs listed below and will be announced on the Altenew blog on April 28th, 2017.

The next stop on the hop is: My Sweet Petunia

Happy Hopping!! ;)

Supplies

April 07, 2017

The Ton's Spring 2017 Release Blog Hop

Hello and welcome to my stop on the The Ton's Spring release blog hop! I am super excited to be taking part and sharing some of the great new stamps in this release! ;) 

You should have arrived here from Vera's blog.

The Ton has 18 new stamps for their new Spring 2017 Release which includes up to three free gifts with purchases. For more information on The Ton’s incentive gifts, head over to The Ton’s blog here. All new release products are available now! 

For my first card I used the new Peony Crush background stamp to create a bright watercolour panel that takes center stage on the card.


I used my Sakura Koi watercolors and painted all of the peonies (except for one reddish one) with the same pink colour. Once the flowers were dry I painted the sky, leaves and stems and then let the entire panel dry.

I trimmed the panel down to 4" x 5 1/4" and adhered it to a grey top-folding card base. I stamped a sentiment from the new Dearest Peony stamp set onto white cardstock with black ink, cut it into a strip and adhered it to the top right of the card. I finished the card with some clear sequins.


For my second card I used the Dearest Peony stamp set and stamped the large peony image onto a piece of watercolour paper with black ink. I love the look of these peony stamps coloured with watercolour! ;)


For this one I used my Kuretake Gansai Tambi watercolours and picked an orangy red colour to paint the large peony. Once the flower petals were completely dry I painted the leaves green and then let the panel air dry.

I stamped the sentiment onto white cardstock with black ink, cut it into a strip and adhered it on the bottom area of the flower. I trimmed the panel down on one side and adhered it to a card base with a black and white striped patterned paper on one side with a silver glitter strip in between.


And for my last card I used the new Wildflower Banner stamp set to create a card with dark rich colours. This card would be perfect for fall (I know a lot of us are heading into spring) and I really wanted to showcase it on my favourite Toned Gray paper with yellows and browns as the main colours.


Once I had it stamped and coloured, I stamped a sentiment into the banner (love that they are already all shaped to fit) and then I trimmed down the panel and added it to a brown card base.

Giveaway
Five $25 gift certificates to The Ton's shop will be given away to random commenters from the hop participant blogs.  To qualify, you must leave a comment on The Ton Blog Hop post. The comment period will close on Monday, April 10th at 11:59pm. Winners will be announced thereafter on The Ton’s blog. 

Thanks so much for joining me for my stop on the hop! The next stop on the hop is Emily's blog here.

Happy Hopping!!!

February 26, 2017

Watercolour Baby Card | Winnie & Walter

Hello everyone! Today I'm guesting over on the Winnie and Walter blog with a cute baby card (and video) to help celebrate their 3rd birthday!

Here's a peek at the card I'm sharing:


You can see the full post over on the W&W blog here.

Thanks for stopping by! Be back soon.